Tuesday, December 31, 2013

Tuesday Tasties No.14

As per my promise last week, this week it's another light meal to compliment the rich food we will indulging in for at least another week.  Well, I will be anyway.

As it's now New Years Eve, I won't keep you for to long and I'll crack right on with things. Namely because I've got masses of cooking to do and cocktails to prepare for my guests. Given the copious amounts of alcohol I shall be consuming throughout the day, I thought I'd share more pictures than usual, just in case you're struggling to read the teeny tiny writing.

Pork & Butterbean Mash

The ingredients list is nice and small which means it's not only time friendly, it's purse friendly as well! You'll need:
  • 2 pork chops - or any cut of pork you'd prefer
  • 1 can of butterbeans, partially drained
  • Olive oil
  • 1 sliced chilli
  • A pinch of dried thyme
  • 2 cloves of sliced garlic
  • A touch of honey
  • 1 tsp of lemon juice
  • Some salt & pepper
  • Some salad
Grab a pan and cook off the chilli and  half of the garlic in a little olive oil.
Then, bung in the butter beans complete with the remaining water and leave on a low heat for a few minutes so they begin to soften up.
While the butterbeans are on the go, grab a griddle pan and crank up the heat, season and oil your pork and pop on the pan.  Don't be afraid to leave them for a few minutes, it'll leave you with those wonderful griddle lines.
By this stage,your butterbeans should be good to go.  Add your lemon juice and thyme and smoosh them up with a fork. They should be nice and fluffy.  If you feel like they're looking a little dry add either 1) a touch of milk, trust me, it works or 2) some creme fraiche.  Both of these will make the beans especially creamey. 
Your pork should be looking good by now, if, like me, you'll only consider eating the fat if it's extra crispy, then Ads assembly below will help you achieve the crispy levels your heart desires.
Once the pork is on the brink of being finished add your honey and garlic.  You'll notice that this adds a gorgeous layer of colour.
Finally, it's time to plate up. I like to put the pork chop on the top of the salad.  This allows the heat from the chop to wilt the salad leaves slightly. Place a generous helping of the butterbean mash on the side.  Delicious!

Hopefully you're not a garlic-phobe and you'll be inspired to give this light, tasty and protein packed dish a go!

Monday, December 30, 2013

Soap & Glory Thick & Fast Mascara - A Review

So as I may have mentioned a while ago, I got my little mitts on a Soap & Glory Yule Monty goodie box as a treat to myself over Christmas. Whilst I am more than familiar with their Bath & Body range, there are a couple of sides to Soap & Glory which are totally virgin territory to me. One such territory is their make-up range which I've heard loads about, but never really got around to trying.

Within my goodie box was their coveted Thick & Fast Mascara which you can pick up for £10 from Boots. Whilst the packaging is pretty simple, I'm not one to judge a book by it's cover, after all, it's the product inside which counts.
From what I'd read, this mascara is designed to create longer, fuller lashes with no clumping and no flaking. In addition, it contains a special polymer which helps to give your lashes some shine.

First impressions, the brush is enormous, well, it's much bigger than what I'm used to using. The obvious downside is that it was a little difficult to reach the lashes in the inner corners of my eye. The big plus is it grabbed most of my lashes with one swift swoop of the brush, ideal if you're in a rush.
I think I've said a couple of times, my lashes are naturally fairly long. As such, I thought the best demonstration for this mascara would be to go naked.  Well, only in the make-up sense. This will allow you, my lovely blog readers, to really see the effect this mascara had on my lashes.
This is my before shot, I don't own eye-lash curlers as I've said before so the after shot is literally my natural lashes with a slick of mascara.
The above is with one coat of mascara only, you could layer this on if you wanted the illusion of thicker lashes.

My initial impressions are my lashes are defined, they have good lift and they do look a heck of a lot longer than in my before shot. Considering it's my first time using the Soap & Glory make-up line I am impressed! What I really love is that my lashes don't look like I've caked them in mascara, they actually look pretty natural all things considered. A make-up bargain at only £10 a pop!

Incidentally, as my Dad is AWESOME, I had another Yule Monty box turn up in the post as an extra Christmas present as he knows how much I love Soap & Glory!  That's my mascara sorted for the next year, thanks a bundle Dad.

Have you used any Soap & Glory make-up?  What do you think I should try next?

Tuesday, December 24, 2013

Tuesday Tasties No.13

At this time of year, we're all overindulging on rich hearty food. This can lead to some guilty 'overeating' feelings over the course of December. Lucky for you, the next couple of Tuesday Tasties posts will be light meals which won't take up precious calories and will leave your tummy with plenty of space to continue scoffing the important stuff, namely chocolate and candy canes.

Onion Soup
 
I've made this recipe a few times now and it's strangley comforting. After you've made it once, it's quite nice to experiment with flavours, for example a good glug of white wine instead of red wine vinegar or wholegrain mustard instead of Dijon. For this you'll need:
  • 30g of unsalted butter
  • 4 onions, sliced - I used a combination of red and white onions
  • 1 tbsp of flour
  • 2 tsp of red wine vinegar
  • A couple of bay leaves
  • A touch of dried thyme
  • 500ml beef stock - use the best quality which you can afford
  • Salt & pepper for seasoning
  • 1 tsp of mustard - you may notice I added mine a little to soon and it split (*enter sad face here*)
  • A touch of parmesan if desired
First things first, heat your butter until its melted and starting to froth.  Then, pop in your onions and sweat down for around 10 minutes.
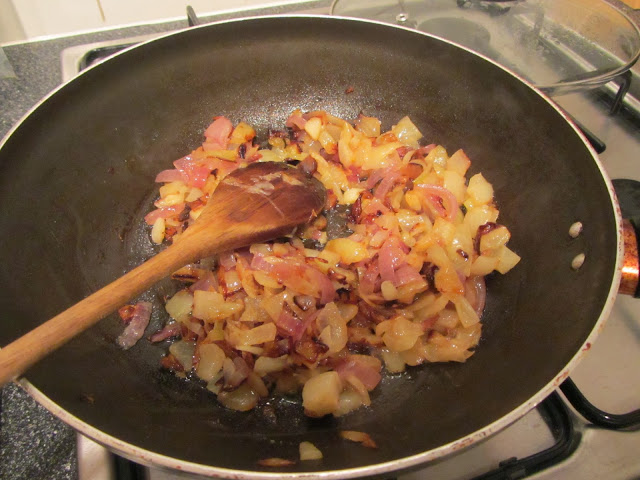
Next, you need to pop the lid on and leave the onions for another 10 minutes to start to caramelise.  If you're a little concerned, you can always add a little bit of stock to reduce the risk of burning, although, if you ask me, it just adds to the flavour.
After 10 minutes, your onions should look like the above.  You'll notice they've really got some colour. Add your flour and mix around a little, this will help the soup to thicken a wee bit. Once you've reached this stage it's time to add all of the stock, the red wine vinegar, your bay leaves, some thyme and a touch of seasoning.
Simmer your soup for a further 10 minutes before turning off the heat and adding the mustard and giving it a quick stir.  If you like more of a kick, English mustard may be more to your liking.  Then it's time to dish up!
This dish is great if you want to play around a little with the flavour.  Don't be put off by the colour, it really is packed full of tasty goodness.

Were you tempted to give this one a go?  What extra ingredients did you try using?


Monday, December 23, 2013

Soap & Glory Peaches and Clean Cleanser - Review

I am a huge fan of the Soap & Glory Bath & Body range and was gutted that last year I simply didn't have the funds to invest in the enormous box which is traditionally the star gift in Boots just before payday. This year, I was determined to be more organised and saved my points all year so I could actually treat myself.

Don't be disheartened, I'm not going to review the entire box of goodies. Instead, I would like to confess that I am actually a Soap & Glory Skincare virgin. Hence the reason for my post today. In the Yule Monty box was their Peaches and Clean 3-in-1 wash of cleanser which you can pick up for £8.00 from Boots.
I've been using this cleanser every day since it came into my possession, I always get stupidly excited when I get my mitts on new skincare and I don't like to wait before cracking it open. This has inevitably led to my bathroom shelf having no fewer than 6 cleansers open at once.  Anyway, I digress.

The bottle promises to be deeply purifying, to remove make-up and to energise your skin, I suppose the big question is, does it deliver?

Firstly, what I love is that the cleanser comes with a pump, this ensures that I get the right amount of product to cleanse my face and nothing goes to waste.
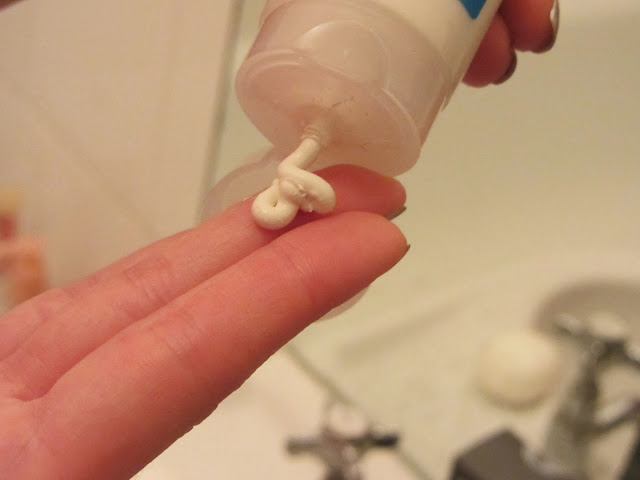
The texture is thick and creamy, not as thick as my Rodial cleanser, nor as thin as my Murad cleanser, it's somewhere in between. This suits me as I can use it with my Clarisonic or massage it into my skin with my fingers if I'm looking to leave the product on my skin for a little longer to allow it to really get to work.

As you begin to apply the product you get a slight hint of the peach and berry extracts, this is then followed by an almost menthol smell from the eucalyptus oil.  I felt a slight tingling sensation on my skin on application which reminds me of cleansers whose function is to help declog and purify the skin, this is ideal if like me, you're concerned about blemishes.

This was a really pleasant cleanser to use in the morning as it woke up my skin (the smell is lovely and refreshing) and in the evenings it removed my make-up effectively.  I wouldn't recommend using this on your eyes, purely as the tingling sensation on the skin may irritate sensitive eyes!

Overall, I think you get a lot for your £8, other cleansers which are aimed at tackling blemish prone skin can cost a small fortune. I really felt like this cleanser worked well to remove dirt and make-up, it definitely left my skin refreshed thanks to it's tingling sensation and it's also kept my hormonal blemishes at bay. The latter is no mean feat given the indulgent food which has been a part of my diet this last week. I smell a possible repurchase on the horizon. 

Have you used Soap & Glory Skincare before?  Are there any products you'd recommend I look into?

Saturday, December 21, 2013

December Birchbox Review

I thought I'd wait a little while before reviewing this months Birchbox.  Partly to ensure I don't spoil the surprise for anyone, but also to see if I changed my mind about it.

The theme this month, other than the obvious Christmas parties is Winter Wonderland with products in this months box designed to help you achieve some sparkle and shine. I always look at the spoilers and was super excited when I spotted Korres, Aromatherapy Associates (which has been on my hit list for months!), Jane Iredale and Sin-Care which has been causing a bit of a stir in the blogging community.

Alas...I didn't receive any of the above. Obviously it wasn't meant to be, hence my earlier comment about changing my mind. In all honesty, this is the first time I've been a little bit, well, disappointed is maybe a bit strong, lets say 'MEH' about my Birchbox.

Moving on, here's what this months box looked like for me.
The bright pink card which you can spot is a $20 gift card for Baublebar to celebrate their UK launch. Baublebar is a website which features all sorts of fashion jewellery which might come in handy if you need to update your accessories any time soon.
Here's a closer look at this months goodies.

  • Number 4 Non-Aerosol Hairspray - 43ml The appeal of this hairspray is that it's environmentally friendly as it's not packed with the usual chemicals you'd find in hairspray cannisters from the drug store. From what I've read it provides fantastic hold without being crunchy thus allowing your hair to maintain it's natural movement.
  • Nail Rock Nail Glitter - Full Size This is fairly similar to the Ciate Caviar/Glitter polishes in that you apply two coats of polish before dipping your nail into the glitter pot and brushing off the excess. Once you've allowed your nails around 20-minutes to dry you're good to go. To be honest, I'm incredibly heavy handed and this sort of thing doesn't really last on my nails.  Whilst the idea is great (the price point is even better), I'm likely to give this away.
  • Twistband - One Band This is the classic no snag hair band.  Super handy and given the variety of colours, you could get away with wearing one of these on your wrist if you fancied.
  • Delarom Acquaconfort Mask - 15ml This is a hydrating mask packed full of Pomegranate extracts to strengthen the skins barrier whilst providing a shield against dehydration.  You only need 5-10 minutes to feel the benefits. This will be handy now the temperatures have dropped!
  • BeeKind Body Lotion - 30ml As you'd expect, this body lotion has honey extracts in addition to chamomile and fresh verbena to keep you smelling wonderful. The unique selling point of this line is that a portion of the proceeds go to support honey bee sustainability.
  • Alima Pure Luminous Shimmer Eyeshadow These products do remind me a little of BareMinerals. They're all natural with no additives, fillers or fragrances which can irritate the skin.  As with the above mentioned brand, with long term use, the products can actually improve and benefit your skin.  The shade is lovely and natural but I'd be more likely to use this eyeshadow when I've got plenty of time to get ready.  Loose powder and me don't really have the best relationship! 
Whilst this is a very mixed bag of products the only product that I'm really excited to use is the face mask.  I have a mountain of body lotions (having been quite lucky and secured a Soap & Glory Box for myself), I don't really style my hair in any manner to warrant the use of hairspray nor will I muster up the motivation to dip my nails in glitter given it will no doubt need removing the following day.

Sorry Birchbox, this month just wasn't for me!

What did you think of the December Birchbox?  Did you get your hands on everything you were hoping for?

Tuesday, December 17, 2013

Tuesday Tasties No.12

Another week has zoomed by, I'm sure everyone has been indulging at staff Christmas parties, pre-festive get togethers with friends and your liver is crying out for a break (maybe it's only me?).  If you're after a light dish which is cheap, quick to prepare and might make you feel as though you're doing your body a nice healthy favour then look no further!

Chicken with Beans and Fennel
 
Please stick with me on this one, it's not a boring as the recipe name may suggest.  The fennel gives this dish a lovely aniseed flavour and once it's cooked, it looks incredibly inviting to eat.  Just what the Dr ordered. You'll need:
  • Olive oil
  • 2 Chicken Breasts or Legs with the skin on
  • 3 garlic cloves, sliced
  • A bulb of fennel, sliced
  • 2 celery stalks, roughly chopped
  • One can of beans - these can be either butter beans, canellini beans or flageolet beans - drained
  • 200ml of chicken stock
Again, the first thing you want to do is wack the oven on to 200 degree and grab yourself an oven proof dish.

Next, heat the pan and cook your chicken skin side down for around 5 minutes so the skin goes a lovely golden colour.  The, set your chicken to one side.
In the same pan (with all the chicken juices in!) and the garlic, celery and fennel and cook until they're beginning to sweat.  You can add some more oil if you think it may need this.  You'll know you've hit the right level of sweating as you'll be able to smell the fennel.
Then add the stock and beans and give it a quick swish around the pan. Pop the bean/fennel mixture into the oven proof dish and place your chicken on the top (skin side up in case you're not sure!).  
Stick this into your oven for around 25-30 minutes or until the chicken is cooked.  A good way to test this is to insert a skewer into the biggest part, if the juices come out clear, then you're as right as rain.  Plate up with the chicken on the top, this will ensure the skin stays nice and crispy.

Hope you enjoy this one, it'll certainly earn you some brownie points on the health front!

This was taken from the Waitrose Kitchen Magazine - a gold mine for food based inspiration!


Monday, December 16, 2013

Clinique Chubby Stick Moisturising Lip Balm - Chunky Cherry - A Review

I love a lip balm me, I leave them lying absolutely everywhere. I've got one in the front room, one in the bedroom, one in my handbag, one on my desk at work and there's even one floating around the bathroom somewhere, you get the point. In case you weren't sure, one of my biggest peeves is dry, chapped lips....YUCK!
 
Moving swiftly on, I'm sure you're all aware of the masses of tinted varieties available on the market which help to keep your pout lovingly moisturised with a slight pop of colour to boot.

One of the first brands I tried, and still have slight love affair with are the Clinique Chubby Sticks.  My Super Strawberry has actually just died a brutal death mostly owing to my determination to use every last slither of it.
Today, I thought I'd share my thoughts on another of the colours within the range, Chunky Cherry.  For those of you not familiar with Chubby Sticks, they are first and foremost a lip balm packed with mango and shea butters for an instant hit of moisturisation for dry lips.
What I love most about the Chubby Sticks is the pencil style nip which allows for a precise application.  As the nip runs a little low, you simply twist the bottom and more product will appear so no sharpeners are needed.
All of the colours are very sheer and therefore provide a subtle effect which isn't to 'in your face' but can certainly be more noticeable if you'd so desire.  Above, the top swatch is with three layers and the bottom is just a quick swipe.

Chunky Cherry is a nice pop of pink/red. I found that the colour lasted for a couple of hours before it had faded into oblivion and needed to be reapplied.  The moisturisation from the mango and shea butters sticks around for much longer though so don't worry that your lips will dry out in between applications.

On me, this colour was more notable in some lights than in others. I think in the below picture my lips are slightly more red than usual and you certainly get a clear idea of the level of colour which can be achieved.
I like to keep these handy in my handbag ('scuse the pun) in case of any unexpected lunches with the girls and when my lipstick isn't within grabbing distance.

I love these and can't wait to try out more of the colours.  You can pick up the Chubby Sticks from any Clinique concession for £17.  Mine lasted well over 6-months so it'll keep you going!

Have you used the Chubby Sticks?  What are your favourite shades?


Saturday, December 14, 2013

Murad Clarifying Mask - A Review

I a few beauty routines which I stick to fairly religiously. One such routine is that every Sunday, I don a slouchy outfit (not beauty related I know, but you've been warned), whip the headband on, cleanse my face and then apply a face mask. 

One of my favourites with the plethora of Christmas get togethers with work, family and friends taking their toll is the Murad Clarifying Mask which you can pick up for £38 from the Murad website or your local concession.
This mask forms part of their Blemish Control range making it ideal to help with any ill-timed breakouts, excess oil production and pesky red patches.

As you can see it's a clay mask.  Beauty addicts will know that clay masks are ideal if you're seeking to draw out any impurities and dirt which might be clogging up your skin.  I can assure you, all the alcohol, rich food and extra chocolaty treats will be playing havoc on your skin right now so this might be something to take a peek at to give it a helping hand.
As it's a clay mask, it has a thick creamy texture which is easy to apply.  Just look at me go! Shall we take a closer peek?
You only need to leave the mask on for 10-minutes to do it's stuff so there's no excuses that you don't have the time, everyone has 10-minutes.  You will feel the clay drying out so try not to move your face around, i.e. no giggling, whilst your waiting or it'll start to crack.

I've been using this mask for a few months now and it's definitely one of my favourites. It helps to calm any red patches, reduce the size of my spots (which always seem to be on one side of my face and nowhere else!) and for a few days after use, I always feel my skin is producing less oil throughout the day which means less make-up!

This is a dependable beauty product which I always rely on for a quick fix to my problem skin and I'd thoroughly recommend it.

Do you have a favourite face mask which you rely on to sort out your skin before a big event?

Tuesday, December 10, 2013

Tuesday Tasties No.11

Now we're in December, one of my favourite things to scoff is a good old fashioned pie. There's just something about the combination of something a little bit naughty (the pastry top), a gorgeous filling packed with big chunks of meat and just the right amount of veggies which seems to always hit the spot.

Chicken & Leek Pie
 
Don't be fooled into thinking that pies always need hours and hours of cooking to taste wonderful, this recipe can be done and on your table in under an hour.  This makes enough for four so Ad and I always have the leftovers for lunch the following day....DELICIOUS! You'll need:
  • Olive oil
  • 4 rashers of bacon, chopped into chunks
  • 1 tbsp of thyme - fresh or dried is up to you
  • 2 Leeks, chopped - I used a pack of baby leeks which is why they're so small
  • Around 400g of chopped chicken or turkey
  • 2 tbsp of flour
  • 500ml of chicken stock - I used a Stock Pot
  • 2 tbsp creme fraiche
  • 100g of crumbled chestnuts (any kind of nut will do, I actually used crumbled walnuts)
  • 1 beaten egg
  • Ready-made puff pastry
So first things first, pre-heat your oven to 200 degrees and lightly oil your pie dish. Then heat a little oil and fry the bacon and thyme together for a couple of minutes. Then add the chopped leeks and cook until they're starting to go translucent.
Once you've reached this stage, remove them from the pan and set aside.

In the same pan, add a little more oil and fry your chicken/turkey until it's starting to brown; this should take between 5-10 minutes. Then re-add the leek/bacon mixture and season to taste.
Then add your flour; this will help to thicken your sauce once you've added the stock. Cook this off for around a minute. Pop in the stock and bring the mixture to the boil. Then reduce the heat and simmer for a minute or two, you should notice the sauce starts to thicken. If this isn't the case you can always add a tiny bit more flour.
Remove the pie mixture from the heat and leave this for a little while. While it's cooling off you can measure out your pastry top for the pie.

Next, it's time to add the creme fraiche and your crumbled nuts. I recommended waiting a short while before doing this as I tend to find if I add it while the mixture is simmering, it has a tendency to split which is anything but pretty.
Bung everything into your pie dish and top with the pastry. Brush the pastry with the beaten egg if desired, this will help to give your pie a nice sheen.  It'll need around 30 minutes in the oven before it's ready to munch.
As you can see, the sauce continues to thicken up while your pie is cooking making it a scrummy comfort food dish whenever you need perking up.  As there's only pastry on the lid, it's not overly naughty either.

Let me know if you were tempted to give this a go. It certainly attracted some attention in the office when I was munching on the leftovers, I've been told it smelt amazing.

This recipe was taken from the Waitrose Kitchen magazine.  You can pick this up for free if you have a Waitrose Card handy.


Monday, December 9, 2013

Murad Advanced Active Radiance Serum - A Review

I have a bit of a soft spot for the Murad products as they always seem to do exactly what they say on the tin. Their Essential-C/Environmental Shield range is ideal for those of us living in the city who need extra protection from pollutants and everyday stresses as it's designed to help renew your skin.
Like other serums, this is designed to be used on the skin after cleansing and toning. Texture wise, it's no different from most serums on the market and one pump is more than enough to cover your entire face. 
Firstly, the smell is wonderful and is exactly the kind of citrus scent you'd expect from a product packed with vitamin-c. They recommend giving the serum a minute to sink into your skin before applying your moisturiser; you'll know when it's time to moisturise as your skin will experience a slight tingle, which I suspect is due to the AHA's in there.

The website states that this will help boost collagen production (by up to 50 times more than topical vitamin-c), cell renewal, skin firmness and skin radiance by up to 63% in about 15 minutes. Now as I'm only 26, I cannot really comment on skin firmness or collagen as my skin is still fairly firm anyway. I'd like to say it looks nice and plump but perhaps that creates the wrong image?  

Radiance-wise I actually think this product delivers, my skin is glowing! Not only that, after only two-weeks of use every morning I think my skin is smoother and I reckon the tone itself is more even. I've had the confidence to head into work sans-foundation/tinted moisturiser and just a touch of concealer and I reckon that's saying something.

Now, lets talk turkey. This is normally £120 for 30ml from Murad directly so it's certainly not cheap. I was lucky enough to receive this as a GWP so didn't have to break out the plastic. Since then, I've also got my mitts on two 5ml samples as part of cheap and cheerful kits from Look Fantastic which contain a wide variety of Murad goodies, which would allow you to familiarise yourself with the range.  

If you're not sure then one of these kits is probably the best way to try out the product and see if it's for you. 5ml is more than enough to last you at least a month and would enable you to see the difference in your skin for yourself. From my understanding there are normal everyday women out there who LOVE this enough to have repeat purchased it on a number of occasions and it's even recommended for Brides to Be to help boost their skin on the run up to the big day.

Whilst I'm not flush on the cash front, I've got more than enough of this stuff to keep me going until my Birthday.  For now, Airport re-purchase anyone?

Have you used this serum before?  What did you think about the results?

Saturday, December 7, 2013

Why Do I Need to Tone My Skin?

Most people have a fairly basic skincare routine which consists namely of cleansing and moisturising once to twice a day. However, there is one vital step missing.  TONING.

I myself have only in the past year or so begun to include this essential step in my daily routine and it's already made a difference to my skin.  

I'm sure you're asking, why is it so important, I never feel as though it really does anything extra?  Well lets start by going through all the various myths and theories shall we?

(1) It removes the last traces of your cleanser
(2) It tightens the skin and closes your pores preparing it for your moisturiser
(3) It removes any last traces of make-up
(4) It helps to bring your skins PH back to neutral after cleansing

Well, (1) was true to an extent at one point in time. In days gone by, cleansers did not contain enough water soluble ingredients thereby leaving the user with a somewhat oily residue on the skin.  The toning step would take care of this issue removing any excess oils on the skin.  Nowadays, most modern cleansers no longer have this problem.

Moving onto (2) again, this has some echoes of truth in it, back in the day most toners were full of alcohol and other astringents.  The alcohol in the toner would leave your skin with the feeling that it was tightening/tingling.  You do need to be cautious with these sorts of toners as they can dry your skin out. I suppose what I'm saying is that toners don't tighten your skin, but can give the illusion that this is the case.

(3) could also be true if your cleanser is not particularly good at removing make-up. To help tackle this problem, I would always recommend removing waterproof make-up with a bi-phase make-up remover before you start cleansing your face.  When in doubt, double cleanse.  If you're still getting make-up residue on your cotton pad after this, then perhaps your cleanser just isn't doing the job!

You'll be pleased to know that (4) is 100% correct, whilst your skin will naturally adjust its PH after cleansing, a toner will help to nudge this along a little bit quicker.  When I went for my first consultation at Murad, they advised that most cleansers are slightly alkaline, as such, a toner will help to neutralise this.

Now we've got the theory out of the way, lets get down to the nitty gritty of why they can help your improve your skincare routine.  Below are some of my favourites.


Many companies such as Murad, Clarins and the like will all have toners which are aimed at addressing different skincare needs.  You can get exfoliating toners (do what they say on the tin) which use acids to help slough away dead skin, hydrating toners which will help to draw moisture to your skin (much like hyaluronic acid) and even toners which are aimed at helping to clarify the skin and keep oil at bay.  It's just a case of finding the right toner for your skincare concern.

Right now I'm loving the Murad Hydrating Toner and have been using this religiously.  It's almost like an extra layer of hydration for my skin and provides a little extra protection from the elements.  In the summer, I keep a bottle in my handbag and spritz on top of my make-up during the day to help give me a dewy glow and refresh my skin.

All in all, I would recommend finding a toner which will slot into your current routine nicely and fits your skins needs. Try to use it religiously for at least 60-days.  If you don't find it's making much of a difference, then maybe it's not something for you.

I hope you've found this post informative/helpful, posts outlining the importance of a good routine have been on my list of things to do for a while now!

Tuesday, December 3, 2013

Tuesday Tasties No. 10 - Dirty Burger, A Review

So this week, instead of the usual recipe I thought I would do something a little different and review on of the many places I've been to scoff.

This week it's the turn of Dirty Burger in Vauxhall.  Ad and I have been on a mission to find the best burger in London and have been valiantly working our way through the offerings.
It's quite unassuming from the outside and it's fairly limited in terms of seating so it's easy to see how it could fill up fairly quickly.  It's literally tucked underneath the railway bridge so ever so often, you'll spot the minor vibrations giving the lights a bit of a jiggle.  Don't let this fool you, these burgers mean serious business.
As you can see, there's a very small menu, but it my eyes, it's better to do one dish amazingly well than lots of dishes half-heartedly.  In addition to the above, they also have a burger, shake and beer of the month to tempt you.  As it was my first visit I kept it simple, two cheeseburgers (one for Ad obviously) and a portion of onion fries.
Will you just look at those fries? Just in case you're struggling to see them, here's a bigger picture for you. No naughty innuendo please, this is a family page.
It's a good job I only had a small breakfast and was pretty hungry.  What was nice was that I could watch my food being cooked from scratch as I was waiting so I can testify, it was all fresh and cooked to order.
It might not look pretty but this burger was delicious.  Soft white bun, gherkins, lettuce, onion, very gooey cheese (which is due to the fact that the burgers are steamed slightly under enormous cloche) and some amazing sauce that really finishes it all off.
The patty was well seasoned and slightly pink which is just to my liking.  It certainly lives up to it's name, it's not tidy to eat at all.  Ladies, if you're worried about juices/food falling out of the bun/eating with your hands/making a mess in general then this place isn't for you.  If like Ad and I and you're beyond all that JAZZ, then this is the place to go.  

I have been advised by a good friend who shall hereby be known as Mr Y, that after a good few drinks in the local the burgers here taste fantastic.  I can assure you that even without an alcoholic influence to warm my tummy then these burgers certainly hit the spot without breaking the bank.  Just be sure to take a couple of wet wipes to wipes all of that delicious juice off of your paws when your finished.

Are you a sucker for a good burger?  Where do you like to go when the hunger pangs strike?


Monday, December 2, 2013

Eyeko Black Magic Mascara - Review

As you may (or may not) know, I am fairly loyal to certain products within my make-up regime.  One of which being the Lancome Hypnose Mascara which curls, lengthens and really defines my lashes.

With the dawning of the Eyeko/Alexa collaboration, I thought perhaps it was about time to try something new and see what all the fuss was about.  Alexa is well known for her feline flick and those well defined eyes so it's safe to assume that Eyeko must deliver on one level or another!

I grabbed this as I was paying for a couple of other goodies in Space NK recently (it was right next to the till so within easy grabbing distance!) and the packet promised a conditioning formula with Keratin and Shea Butter to nourish and condition lashes without compromising on staying power.
Other cheeky bonuses include being paraben free, waterproof and flake free.  So, how did it fare?
Well, what was interesting was the wee pop shield which comes with each mascara which is to help prevent smudges.  In all honesty, this happens to me a lot. I always seem to get a little dot or two near the brows where I've been a bit keen with the the brush.  It took a little getting used to but practice makes perfect.

Now the brush.
As you can see, there's a good curve which help to lift and volumise your lashes.  You'll also note that there's no horrible gloopy bit on the end of the brush.  This gives it a big plus in my books and is always something which put me off making the switch to another brand in the first place.

I suppose some before and after shots would help you to make a decision.  I thought the best thing to do would be to pop on my make-up first so you could truly see the difference it makes.
I am slightly overdue a threading so please try to see past that.  These are my lashes before, I don't own an eyelash curler but I think I'm quite lucky that my lashes are naturally fairly long.
These are my lashes after just one application of the mascara.  You can see they're longer, obviously defined and they have a good curl to them as well.

Overall, at £18 a pop I think this mascara is fab and it's true to its word in that it's long lasting and doesn't flake.  Yesterday I did an afternoon fuelled with lunch, clubbing and then an evening at the Southbank Christmas Markets without needing a touch-up.  Brilliant.

Have you used the Eyeko Mascaras before?  What did you think?


Design by Studio Mommy (© Copyright 2015)